
The project we are about to set up is a 3-tier architecture in Asp.Net Core Web API Application and using the .Net core 5 version.
In this tutorial, we will create a main front-tier Asp.Net Core Web API project and create the other 3-tiers for Services, Model, Data. All these tiers and project is completely explained below.
Tools that I’m using:
Project Set-Up:
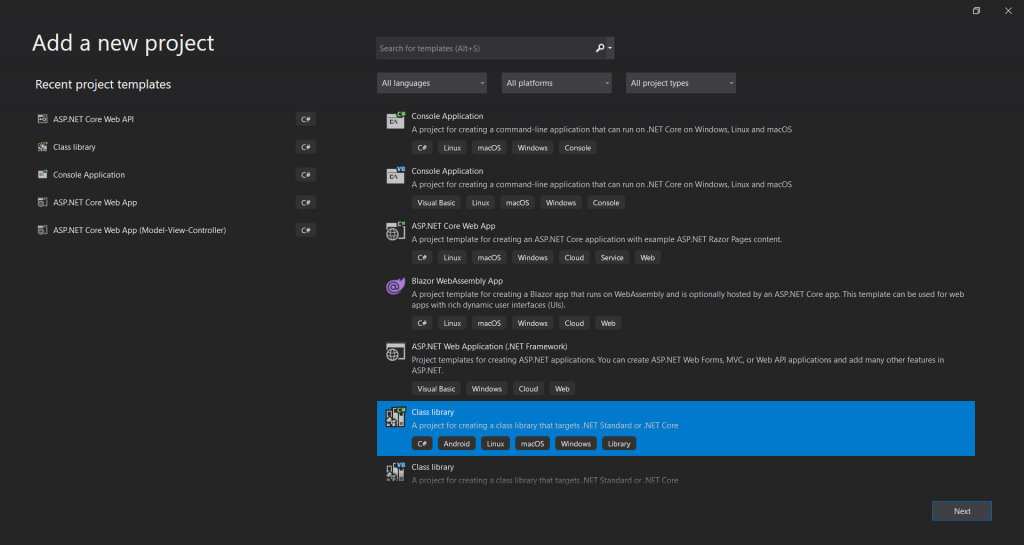
First of all, we will set up a web API project.
Open Visual Studio and follow the below steps.
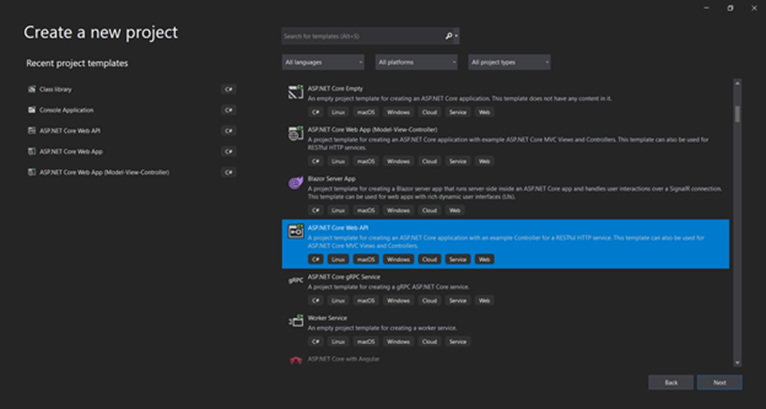
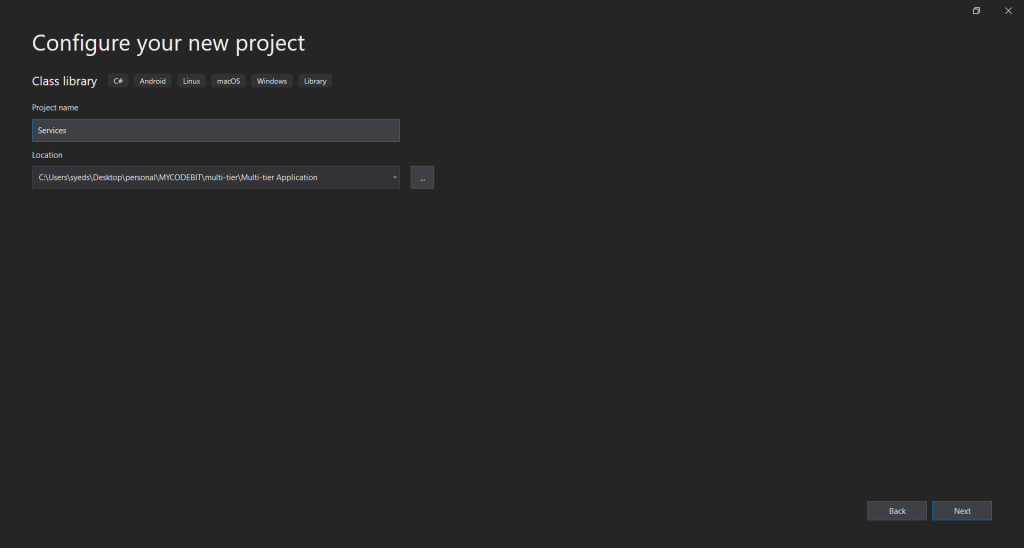
Now name your project and select a location.
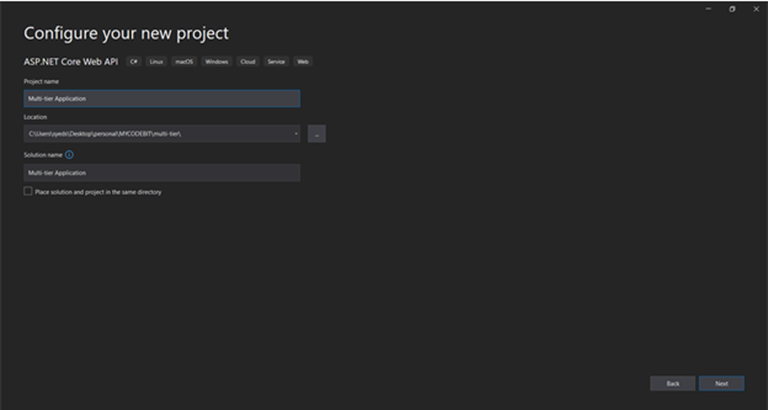
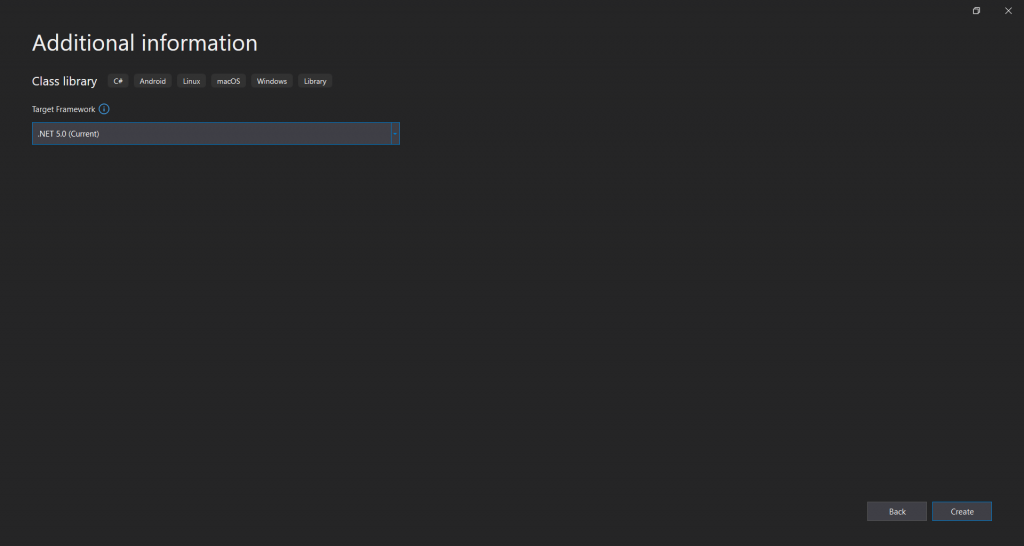
Select Version of .Net Core. We are working on the latest one so we will go with the .Net Core 5.

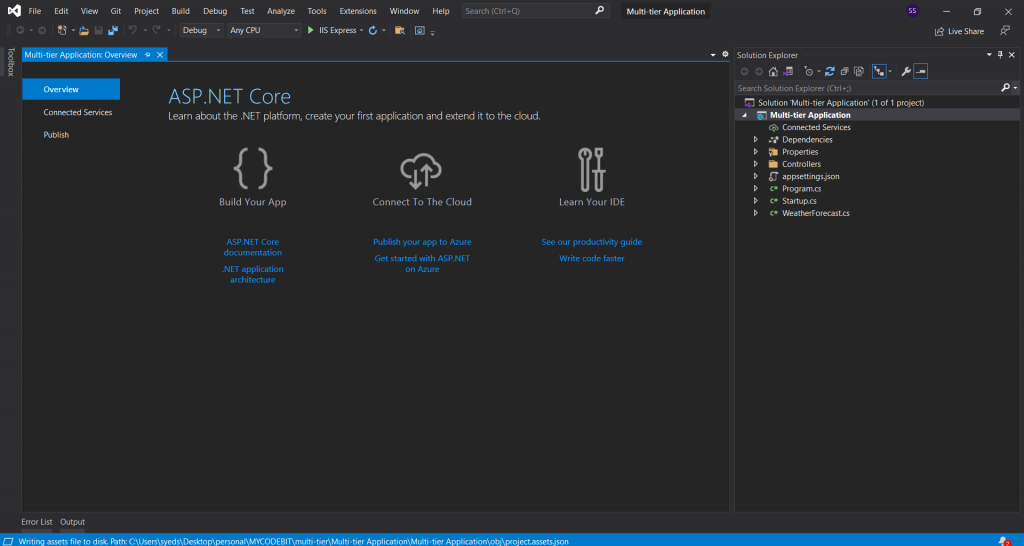
Now your screen will look like this.
After Setting up your project you have to add new projects to achieve multi-tier architecture.
Add 3 Class Library Projects:
- Services
- Model
- Data
Services:
In this project we will create 3 projects one project for services, we will implement our business logic in services and call the services from our main API project to get the tasks done. Services will interact with the data and perform the operations on data and return the response to Apis. Our Main Api project will not directly interact or link with our database.
Model:
Model so that we can add our database classes to it. We are using Entity Framework Core so after making our data classes in Model using the code first approach we will run the migration and our database will be generated. In the Model layer, we will also put our ViewModels and create models for API responses.
Data:
In Data Layer We will put our ApplicationDbContext Class, Our Seeding Classes, and constants if our application does have any. Migrations will also be in this layer.
For adding a new project click on File -> Add -> New Project
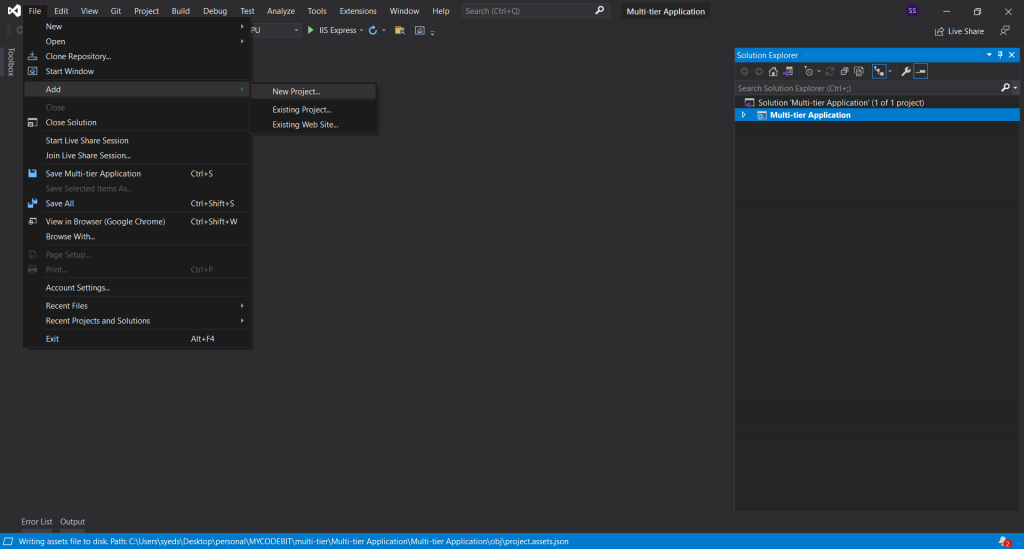
After Clicking on Add new project. You will have a screen like this
Click on class library, Give a name to your project.
Now select the .Net Core version we are working on version 5 so I will go with .Net Core 5.
Repeat the above-mentioned steps and Add a total of 3 Projects.
Add Reference:
Now add a reference to the other projects so we can work with these tiers.
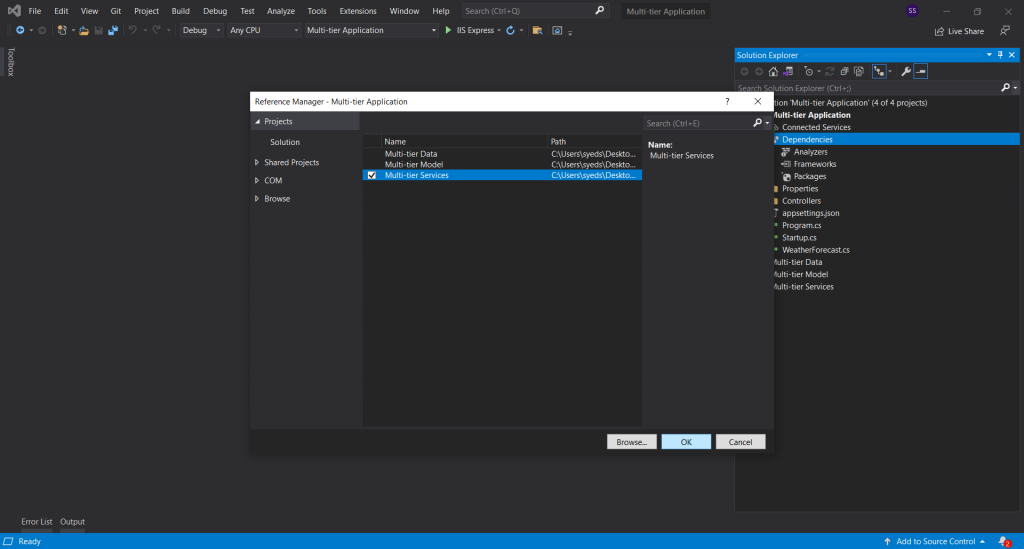
Add a reference in your Main Api project to the services. Because We will call our services through Apis and our services will have all the business logic, not our front API.
Following below-mentioned.
Right-click on dependencies and click on Add Project Reference.
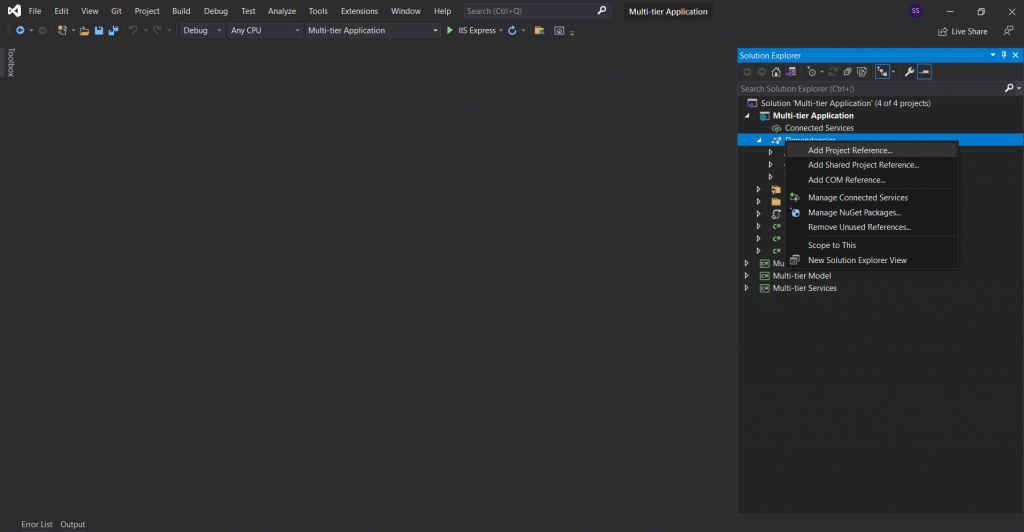
Now Select Service and press ok.
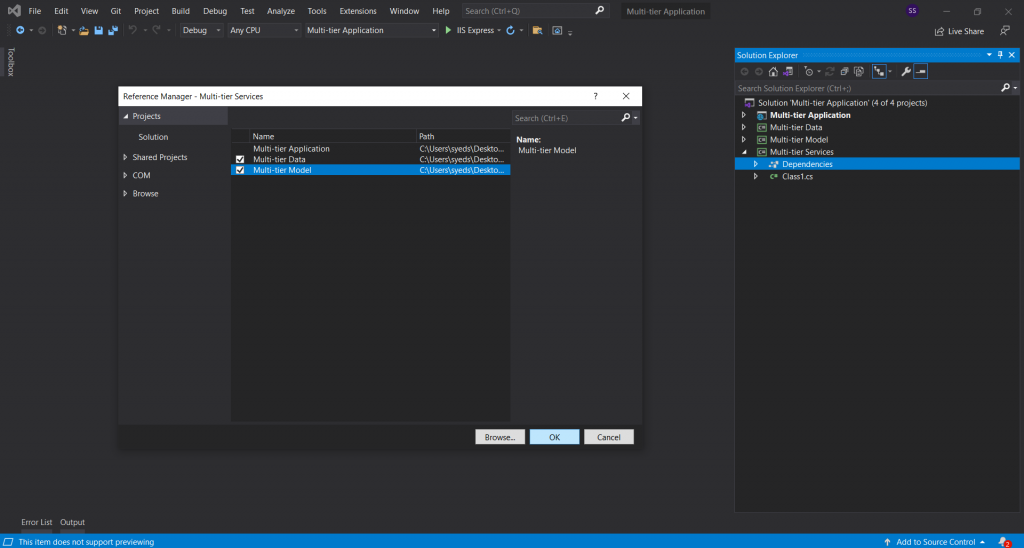
Now in the Services project add a reference to Model and Data project like this. Because we will manipulate data and perform operations on data through services. Without adding the reference we will not be able to do this.
Now in Data Project add a reference to Model Project. Because Model Layer contains all our data classes/Model. And with reference, we will use it in our ApplicationDbContext.

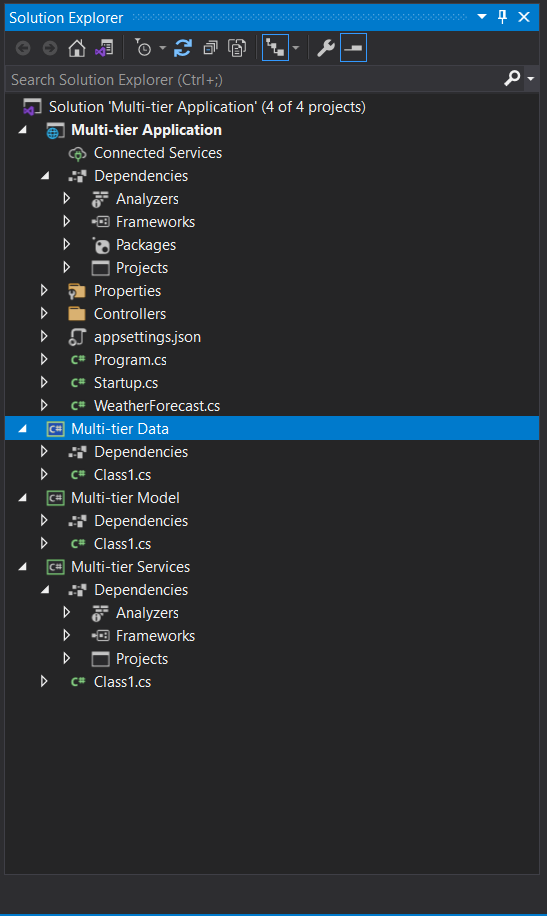
Now we are done with the references and now our 3-tier or multi-tier application is ready for the work.
Now our Application will look like this:
I will create a database using the Entity Framework Core code-first approach and implement Identity on this project in my next post. Will also continue with RESTful APIs. Stay Connected.
Understanding the 3-Tier Architecture
When it comes to building robust and scalable applications, it’s important to have a solid architecture in place. The 3-tier architecture is a popular architecture pattern that helps to ensure separation of concerns, scalability, and maintainability of applications.
The 3-tier architecture consists of three main components or tiers: the presentation tier, application tier, and data tier. The presentation tier, also known as the client tier, is the user-facing part of the application. It handles user input and output, and communicates with the other tiers to process user requests.
The application tier, also known as the business logic tier, is responsible for processing and manipulating data. It contains the application’s business logic, which defines the rules and workflows that govern how the application functions.
Finally, the data tier, also known as the persistence tier, is responsible for storing and retrieving data. It interacts with the database or other data storage mechanism, and provides an abstraction layer between the application and the underlying data store.
One of the key benefits of using the 3-tier architecture is that it promotes separation of concerns between different parts of the application. By separating the presentation, application, and data tiers, each tier can be developed and maintained independently, which makes it easier to make changes and fix issues. This also makes it easier to scale the application, since different tiers can be scaled up or down as needed.
Another benefit of the 3-tier architecture is that it makes it easier to reuse components across different applications. For example, the business logic layer of one application can be reused in another application, which saves development time and resources.
Testing the Application
After setting up the 3-tier architecture in your ASP.NET Core Web API application, it’s important to test the application thoroughly to ensure that it functions correctly and meets the desired requirements. Testing your application can help you identify and fix issues before your users encounter them, which can save you time and money in the long run.
There are different types of testing you can perform on your application, such as unit testing and integration testing. Unit testing involves testing individual components of your application in isolation, such as testing a single method or function. Integration testing involves testing how different components of your application work together.
To write unit tests for your application, you can use a testing framework such as xUnit, NUnit, or MSTest. These frameworks provide a way to write and run automated tests for your application, which can help you catch bugs and ensure that your code works as expected. You can write unit tests for your controllers, services, and repositories to ensure that they work correctly and handle different scenarios.
In addition to unit testing, you can also test your Web API using tools such as Postman. Postman allows you to test your API endpoints and see the responses that your application returns. You can use Postman to test different scenarios, such as sending invalid data to your API or testing how your API handles authentication and authorization.
What is the three-tier architecture in API?
The three-tier architecture is a popular architecture pattern used in API development that provides a structured approach to building scalable and maintainable applications. It is composed of three tiers or layers: the presentation tier, application tier, and data tier.
The presentation tier is responsible for handling user input and output, and communicating with the other tiers to process user requests. It is also known as the client tier because it is the part of the application that users interact with.
The application tier, also known as the business logic tier, is responsible for processing and manipulating data. It contains the application’s business logic, which defines the rules and workflows that govern how the application functions. This tier is responsible for handling the application’s core functionality.
The data tier, also known as the persistence tier, is responsible for storing and retrieving data. It interacts with the database or other data storage mechanism and provides an abstraction layer between the application and the underlying data store.
The three-tier architecture helps to promote separation of concerns between different parts of the application, which makes it easier to make changes and fix issues. Each tier can be developed and maintained independently, which makes it easier to scale the application and modify it over time.


