
Welcome to mycodebit.com.In this article we will learn How to Create PDF Document in ASP.NET Core 6 Web API. This is a very common task that we face daily as an ASP.NET Core web developer. In this post, I’m using Visual Studio 2022 and .NET version 6.0.
You can download the complete source code from here.
Let’s start with the practical.
Create a new Project:
To create a new project first open visual studio and click on “create a new project”. After that select “ASP.NET Core Web API” as a project template.
Configure Project:
Configure the project setting after project template selection. Give a name to the project and select a location to save the project, click on next and select a .NET version 6.0. Click on create project.
Now we have successfully created our project.
Install-Package DinkToPdf:
DinkToPdf is an open-source library that we can use as a package to build pdf documents in our ASP.NET Core web API project. We can install this package by “Package Manager Console”.
Install-Package DinkToPdf
Configure the Package into Program.cs:
After installing the package we have to configure the DinkToPdf service into Program.cs file so we can use it in our project.
// Add services to the container.
builder.Services.AddSingleton(typeof(IConverter),
    new SynchronizedConverter(new PdfTools()));
And do not forget to add these libraries in your program.cs.
using DinkToPdf;
using DinkToPdf.Contracts;
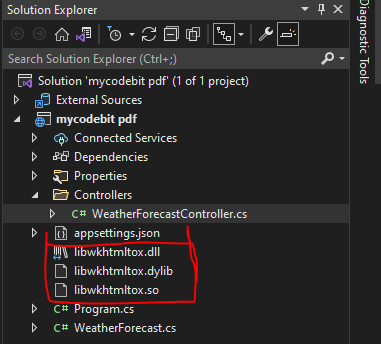
Download the libraries:
We have some compulsory libraries to generate PDFs in our project. Download these libraries into your project folder.
After clicking on libraries you will find the option to download the file.
Code Example:
Let’s move to the code now. I have created a method in the controller to generate PDF files.
[HttpGet("GeneratePDF")]
        public IActionResult GeneratePDF()
        {
            var html = $@"
           <!DOCTYPE html>
           <html lang=""en"">
           <head>
               Heading Here.
           </head>
          <body>
          <h1>Welcome to mycodebit.com</h1>
          <p>Lorem ipsum dolor sit amet, consectetur adipiscing elit, sed do eiusmod tempor.</p>
          </body>
          </html>
          ";
            GlobalSettings globalSettings = new GlobalSettings();
            globalSettings.ColorMode = ColorMode.Color;
            globalSettings.Orientation = Orientation.Portrait;
            globalSettings.PaperSize = PaperKind.A4;
            globalSettings.Margins = new MarginSettings { Top = 25, Bottom = 25 };
            ObjectSettings objectSettings = new ObjectSettings();
            objectSettings.PagesCount = true;
            objectSettings.HtmlContent = html;
            WebSettings webSettings = new WebSettings();
            webSettings.DefaultEncoding = "utf-8";
            HeaderSettings headerSettings = new HeaderSettings();
            headerSettings.FontSize = 15;
            headerSettings.FontName = "Ariel";
            headerSettings.Right = "Page [page] of [toPage]";
            headerSettings.Line = true;
            FooterSettings footerSettings = new FooterSettings();
            footerSettings.FontSize = 12;
            footerSettings.FontName = "Ariel";
            footerSettings.Center = "This is for demonstration purposes only.";
            footerSettings.Line = true;
            objectSettings.HeaderSettings = headerSettings;
            objectSettings.FooterSettings = footerSettings;
            objectSettings.WebSettings = webSettings;
            HtmlToPdfDocument htmlToPdfDocument = new HtmlToPdfDocument()
            {
                GlobalSettings = globalSettings,
                Objects = { objectSettings },
            };
            var pdfFile = _converter.Convert(htmlToPdfDocument); ;
            return File(pdfFile,
            "application/octet-stream", "DemoPdf.pdf");
        }
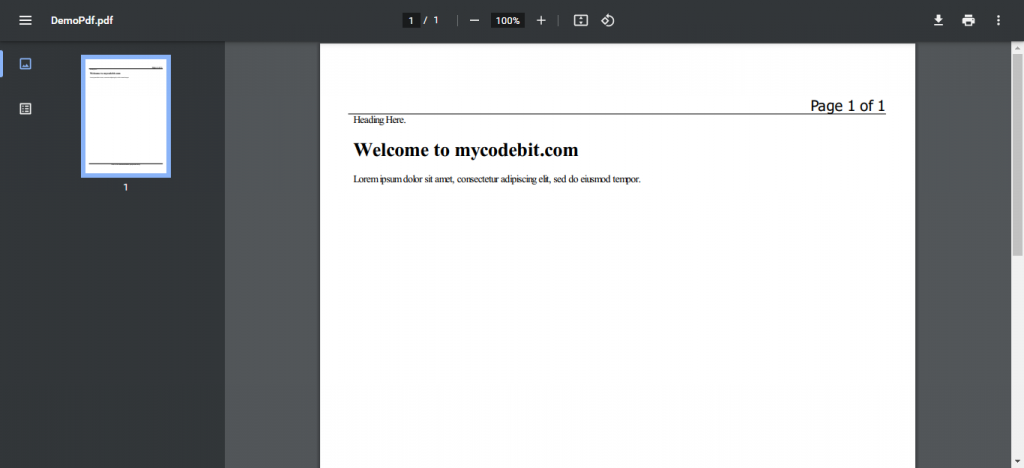
This method will return a file in the response and when we click on the file we can download it.

Click on the file and it will be downloaded. Here is our downloaded file.
Setting up the Development Environment
Before you can start creating PDF documents in ASP.NET Core 6 Web API, you need to make sure that your development environment is set up properly. Here are the steps you need to take:
Installing necessary software and tools
To create an ASP.NET Core 6 Web API project, you’ll need to have the following software and tools installed on your computer:
- .NET 6 SDK: This is the software development kit for .NET 6, which is required to create ASP.NET Core 6 Web API projects.
- Visual Studio 2019 or later: This is the integrated development environment (IDE) for building .NET applications. You can also use Visual Studio Code, but you’ll need to install some extensions to work with .NET.
Creating a new ASP.NET Core 6 Web API project
Once you have the necessary software and tools installed, you can create a new ASP.NET Core 6 Web API project. Here’s how to do it:
- Open Visual Studio and click on “Create a new project”.
- In the “Create a new project” dialog, select “ASP.NET Core Web API” and click “Next”.
- Choose a project name and location, then click “Create”.
- In the “Create a new ASP.NET Core web app” dialog, select “API” as the project template, then click “Create”.
Adding necessary NuGet packages
To create PDF documents in ASP.NET Core 6 Web API, you’ll need to add some NuGet packages to your project. Here’s how to do it:
- In Visual Studio, right-click on your project in the Solution Explorer, then select “Manage NuGet Packages”.
- In the “Manage NuGet Packages” dialog, search for “iTextSharp” or “PdfSharpCore”, which are popular libraries for generating PDF documents in .NET.
- Select the library you want to use, then click “Install”.
- Once the installation is complete, you’re ready to start creating PDF documents in ASP.NET Core 6 Web API.
Creating PDF Documents
After setting up the development environment, you’re ready to start creating PDF documents in ASP.NET Core 6 Web API. Here are the steps you need to take:
There are several libraries available for generating PDF documents in .NET, such as iTextSharp, PdfSharpCore, and IronPDF. Each library has its own strengths and weaknesses, so you’ll need to choose the one that best fits your needs.
Choosing a PDF generation library
To choose a PDF generation library, you should consider the following factors:
- Ease of use: Some libraries are easier to use than others, especially for beginners.
- Functionality: Some libraries offer more advanced features, such as adding digital signatures or extracting text from PDF documents.
- Price: Some libraries are free, while others require a license fee.
Setting up the chosen library
Once you’ve chosen a PDF generation library, you’ll need to set it up in your ASP.NET Core 6 Web API project. Here’s how to do it:
- In Visual Studio, right-click on your project in the Solution Explorer, then select “Manage NuGet Packages”.
- Search for the PDF generation library you’ve chosen, then click “Install”.
- Once the installation is complete, you’re ready to start using the library in your project.
Writing code to generate a simple PDF document
To generate a simple PDF document using your chosen PDF generation library, you’ll need to write some code in your ASP.NET Core 6 Web API project. Here’s an example using iTextSharp:
using iTextSharp.text;
using iTextSharp.text.pdf;
public ActionResult GeneratePDF()
{
Document document = new Document();
PdfWriter.GetInstance(document, new FileStream(“myPDF.pdf”, FileMode.Create));
document.Open();
Paragraph paragraph = new Paragraph(“Hello World!”);
document.Add(paragraph);
document.Close();
return File(“myPDF.pdf”, “application/pdf”);
}
This code creates a new PDF document, adds a “Hello World!” paragraph to it, saves it to disk, and returns it as a file download.
Adding More Content to PDF Documents
After you’ve learned how to create a simple PDF document, you may want to add more content to it, such as text, images, tables, and headers/footers. Here are the steps you need to take:
Adding text and images to the PDF document
To add text and images to a PDF document using your chosen PDF generation library, you can use the following code:
Document document = new Document();
PdfWriter.GetInstance(document, new FileStream(“myPDF.pdf”, FileMode.Create));
document.Open();
Paragraph paragraph = new Paragraph(“This is a paragraph of text.”);
document.Add(paragraph);
Image image = Image.GetInstance(“myImage.jpg”);
document.Add(image);
document.Close();
This code adds a paragraph of text and an image to the PDF document. You can customize the appearance of the text and image by using the properties of the Paragraph and Image classes.
Styling the PDF document
To style the PDF document using your chosen PDF generation library, you can use the following code:
Document document = new Document();
PdfWriter.GetInstance(document, new FileStream(“myPDF.pdf”, FileMode.Create));
document.Open();
Font font = FontFactory.GetFont(FontFactory.HELVETICA_BOLD, 16, BaseColor.RED);
Chunk chunk = new Chunk(“This is a chunk of text.”, font);
document.Add(chunk);
document.Close();
This code adds a chunk of text with a bold, red font to the PDF document. You can customize the font, font size, font color, and other properties of the text by using the properties of the Font and Chunk classes.
Adding headers and footers
To add headers and footers to the PDF document using your chosen PDF generation library, you can use the following code:
Document document = new Document();
PdfWriter.GetInstance(document, new FileStream(“myPDF.pdf”, FileMode.Create));
PageEventHelper pageEventHelper = new PageEventHelper();
PdfWriter writer = PdfWriter.GetInstance(document, new FileStream(“myPDF.pdf”, FileMode.Create));
writer.PageEvent = pageEventHelper;
document.Open();
Paragraph paragraph = new Paragraph(“This is a paragraph of text.”);
document.Add(paragraph);
document.Close();
This code adds a simple header to the PDF document using a PageEventHelper class. You can customize the header and footer by creating your own PageEventHelper class and implementing the OnStartPage and OnEndPage methods.
Adding tables to the PDF document
To add tables to the PDF document using your chosen PDF generation library, you can use the following code:
Document document = new Document();
PdfWriter.GetInstance(document, new FileStream(“myPDF.pdf”, FileMode.Create));
document.Open();
PdfPTable table = new PdfPTable(3);
table.AddCell(“Header 1”);
table.AddCell(“Header 2”);
table.AddCell(“Header 3”);
table.AddCell(“Value 1”);
table.AddCell(“Value 2”);
table.AddCell(“Value 3”);
document.Add(table);
document.Close();
This code adds a simple table with three columns and two rows to the PDF document. You can customize the number of columns and rows, as well as the content of the cells, by using the properties and methods of the PdfPTable class.
Enhancing the PDF Generation Process
After you’ve learned how to create and add content to PDF documents in ASP.NET Core 6 Web API, you may want to enhance the PDF generation process by creating reusable PDF templates, generating PDF documents from HTML or database data, and improving performance when generating large PDF documents. Here are the steps you need to take:
Creating reusable PDF templates
To create reusable PDF templates using your chosen PDF generation library, you can define the common elements of your PDF documents, such as headers, footers, and logos, in a separate file and reuse them across multiple PDF documents. Here’s an example using iTextSharp:
PdfPCell cell = new PdfPCell();
cell.Border = 0;
cell.FixedHeight = 50f;
Image image = Image.GetInstance(“myLogo.jpg”);
cell.AddElement(image);
PdfPTable table = new PdfPTable(1);
table.WidthPercentage = 100;
table.AddCell(cell);
Document document = new Document();
PdfWriter.GetInstance(document, new FileStream(“myPDF.pdf”, FileMode.Create));
document.Open();
document.Add(table);
document.Close();
This code creates a reusable PDF template with a logo and adds it to a PDF document. You can customize the content of the PDF document by adding additional elements to it.
Generating PDF documents from HTML
To generate PDF documents from HTML using your chosen PDF generation library, you can use the following code:
string html = ” Hello World!
“;
Document document = new Document();
PdfWriter.GetInstance(document, new FileStream(“myPDF.pdf”, FileMode.Create));
document.Open();
HTMLWorker htmlWorker = new HTMLWorker(document);
StringReader stringReader = new StringReader(html);
htmlWorker.Parse(stringReader);
document.Close();
This code generates a PDF document from a simple HTML string using the HTMLWorker class. You can customize the HTML string to include more complex formatting, images, and tables.
Generating PDF documents from database data
To generate PDF documents from database data using your chosen PDF generation library, you can use the following code:
List customers = dbContext.Customers.ToList();
Document document = new Document();
PdfWriter.GetInstance(document, new FileStream(“myPDF.pdf”, FileMode.Create));
document.Open();
foreach (Customer customer in customers)
{
Paragraph paragraph = new Paragraph(customer.FirstName + ” ” + customer.LastName);
document.Add(paragraph);
}
document.Close();
This code generates a PDF document with customer data from a database using Entity Framework. You can customize the data retrieval and formatting to fit your specific needs.
Enhancing performance when generating large PDF documents
To enhance performance when generating large PDF documents using your chosen PDF generation library, you can use the following techniques:
- Use lazy loading to load data only when it’s needed.
- Use asynchronous programming to generate the PDF document in the background.
- Use caching to store frequently used data and avoid unnecessary database queries.
Conclusion
If you face any problem do not hesitate to comment below and you can give any suggestions to contact us.
I have enlisted the Top 15 ASP.NET Core interview questions according to the market. If you want to prepare yourself for ASP.NET Core Interview questions you can our this post.


how can we add parameters directly through api and generate a pdf and the template should be of email
Write a function to receive parameters, parse that parameters to HTML, convert it to the PDF, and send the email. You can find the tutorials about sending email using smtp and Gmail on my blog.
i want a template to be converted to pdf through api by passing parameters to the template