
In this post, we will discuss and learn how we can import CSV file in ASP.NET Core project and save the data into our database. It is very simple and easy to import CSV files in ASP.NET Core. First of all, if you have not created your project, you can create your ASP.NET Core 3-tier Application following this.
Tools:
Let’s get started:
Before starting our procedure, we have to create a table in our database to store our data. To create a table, we are using the code-first approach.
we will create a Model/Class.
public class Student
{
    public Guid Id { get; set; }
    public string Name { get; set; }
    public string Class { get; set; }
    public string Roll_No { get; set; }
}
After Creating our class, we will add a reference to this class in our “ApplicationDbContext.cs” Class.
public DbSet<Student> Students { get; set; }Now Run migration.
Add-migrationNow we will update our database.
update-databaseFirst of All, we have to install this NuGet package into our project.
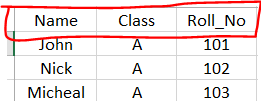
Install-Package CsvHelper -Version 27.1.1Our CSV file looks like this, and we have encircled our header row.
Now we will create a class with the same properties as we have a header row in the CSV file because we have to receive data accurately from the CSV file.
public class file
{
    public string Name { get; set; }
    public string Class { get; set; }
    public string Roll_No { get; set; }
}
Here is how we will receive and store data from files in our controller or service.
public async Task<ResponseViewModel<object>> UploadData(IFormFile file)
{
  try
  {
     var fileextension = Path.GetExtension(file.FileName);
     var filename = Guid.NewGuid().ToString() + fileextension;
     var filepath = Path.Combine(Directory.GetCurrentDirectory(),   "wwwroot","files", filename);
     using (FileStream fs = System.IO.File.Create(filepath))
     {
          file.CopyTo(fs);
     }
     if(fileextension == ".csv")
     {
        using (var reader = new StreamReader(filepath))
            using (var csv = new CsvReader(reader, CultureInfo.InvariantCulture))
            {
                var records = csv.GetRecords<file>();
                foreach (var record in records)
                {

                    if (string.IsNullOrWhiteSpace(record.Name))
                    {
                        break;
                    }
                    Student student;
                    student = _context.Students.Where(s => s.Name == record.Name).FirstOrDefault();

                    if (student == null)
                    {
                        student = new Student();
                    }

                    student.Name = record.Name;
                    student.Class = record.Class;
                    student.Roll_No = record.StateWebsite;

                    if (student.Id == Guid.Empty)
                    _context.Studnets.Add(student);
                    else
                        _context.Students.Update(student);
                }
                 _context.SaveChanges();
     }
     else
     {
       return new ResponseViewModel<object>
       {
         Status = false,
         Message = "You can onlu add CSV file",
         StatusCode = System.Net.HttpStatusCode.unprocessableentiy.ToString()
       };
     }
       return new ResponseViewModel<object>
       {
          Status = true,
          Message = "Data Updated Successfully",
          StatusCode = System.Net.HttpStatusCode.OK.ToString()
       };
     }
     catch (Exception e)
     {
        await _exceptionServices.CreateLog(e, null);
        throw e;
     }
 }
Now let’s dive into our code. In the first section, we get our file and its extension, Saving its copy in our “wwwroot” folder in our application. After saving, we are checking if it’s a “CSV” file. We will check if it’s a CSV file or not, and if it is “CSV,” we will read our “CSV” file and read all the record and convert it into a “list<file>.” After that, we are applying a foreach loop on this list. In the loop, we check if there is a record that already exists in our database. If it already exists, we will update it, and if it doesn’t, we add this to our database.
Setting up the ASP.NET Core project
To begin, you’ll need to have the latest version of Visual Studio installed on your computer. If you don’t have it installed already, you can download it for free from the official Microsoft website.
Next, you’ll need to add the CsvHelper library to your project. CsvHelper is a powerful library that makes it easy to read and parse CSV files in .NET applications. You can add CsvHelper to your project using the NuGet package manager in Visual Studio.
Once you have Visual Studio and CsvHelper set up, you’re ready to create your ASP.NET Core project. Here’s how to do it:
- Open Visual Studio and click on “Create a new project”.
- Select “ASP.NET Core Web Application” from the list of project templates and click “Next”.
- Give your project a name and choose a location to save it. Then, click “Create”.
- In the next screen, choose “Web Application” as the project template and click “Create”.
- Once your project is created, open the Package Manager Console in Visual Studio by going to “Tools” > “NuGet Package Manager” > “Package Manager Console”.
- In the Package Manager Console, type “Install-Package CsvHelper” and hit enter. This will install CsvHelper and all its dependencies in your project.
And that’s it! Your ASP.NET Core project is now set up to handle CSV files. In the next section, we’ll take a look at how to read CSV files using the CsvHelper library.
Reading CSV files in ASP.NET Core
Now that we have our ASP.NET Core project set up to handle CSV files, let’s take a look at how to read CSV files using the CsvHelper library. CsvHelper provides a simple and efficient way to read CSV files in .NET applications, and it’s easy to get started.
First, we need to add the necessary using statement at the top of our code file:
using CsvHelper;
This will allow us to use the CsvHelper library in our code.
Next, we’ll create an instance of the CsvReader class and pass in a TextReader object that contains the CSV data we want to read. The TextReader object can be created from a file stream or a string. Here’s an example of how to read a CSV file using CsvHelper:
using (var reader = new StreamReader(“path/to/csv/file.csv”))
using (var csv = new CsvReader(reader, CultureInfo.InvariantCulture))
{
var records = csv.GetRecords();
}
In this example, we’re using a StreamReader to read the CSV data from a file located at “path/to/csv/file.csv”. We then create a new CsvReader instance and pass in the StreamReader object along with the CultureInfo.InvariantCulture parameter to specify the culture to use for parsing the CSV data.
Finally, we call the GetRecords method of the CsvReader object and pass in the type of the class that we want to map the CSV data to. CsvHelper will automatically map the CSV data to the properties of the specified class and return a collection of objects of that type.
And that’s it! We now have a collection of objects containing the CSV data that we can use in our ASP.NET Core application. In the next section, we’ll take a look at how to parse the CSV data using CsvHelper.
Parsing CSV data in ASP.NET Core
Once we have read the CSV data into our ASP.NET Core application using CsvHelper, the next step is to parse the data into usable format. Parsing refers to the process of transforming the raw CSV data into a structured format that we can use in our application. Fortunately, CsvHelper makes this process very easy.
To parse the CSV data, we need to create a class that represents the structure of the data. This class should have properties that match the columns in the CSV file. Here’s an example of a class that represents a simple CSV file with two columns, “Name” and “Age”:
public class MyCsvClass
{
public string Name { get; set; }
public int Age { get; set; }
}
Once we have our class, we can use CsvHelper to parse the CSV data into a collection of objects of that type. Here’s an example of how to do this:
using (var reader = new StreamReader(“path/to/csv/file.csv”))
using (var csv = new CsvReader(reader, CultureInfo.InvariantCulture))
{
var records = csv.GetRecords().ToList();
}
In this example, we’re using the GetRecords method of the CsvReader object again, but this time we’re passing in our MyCsvClass type as the generic type argument. CsvHelper will automatically map the CSV data to the properties of this class, and return a collection of objects of that type.
Once we have the collection of objects, we can iterate through them and manipulate the data as needed. For example, we could filter the data based on certain criteria, or aggregate the data to perform calculations.
And that’s it! With CsvHelper, parsing CSV data in ASP.NET Core is a breeze. In the next section, we’ll take a look at how to display the CSV data in a web application.
Displaying CSV data in ASP.NET Core
Now that we have read and parsed the CSV data using CsvHelper in our ASP.NET Core application, the next step is to display the data in a web application. In this section, we’ll explore how to use the Model-View-Controller (MVC) framework to display the CSV data.
To begin, we’ll need to create a new controller in our ASP.NET Core application. The controller will be responsible for handling requests and returning views that display the CSV data. Here’s an example of how to create a simple controller that returns a view containing the CSV data:
public class CsvController : Controller
{
public IActionResult Index()
{
using (var reader = new StreamReader(“path/to/csv/file.csv”))
using (var csv = new CsvReader(reader, CultureInfo.InvariantCulture))
{
var records = csv.GetRecords().ToList();
return View(records);
}
}
}
In this example, we’re creating a new controller called CsvController. The Index action method is responsible for returning a view that displays the CSV data. First, we read and parse the CSV data using CsvHelper, just like we did in the previous sections. Then, we return a view with the parsed data passed as a parameter.
Next, we’ll need to create a new view that displays the CSV data. Here’s an example of a simple view that displays the CSV data in a table:
@model List<MyCsvClass> <table> <thead> <tr> <th>Name</th> <th>Age</th> </tr> </thead> <tbody> @foreach (var record in Model) { <tr> <td>@record.Name</td> <td>@record.Age</td> </tr> } </tbody> </table>
In this example, we’re using the @model directive to specify the type of the model that the view expects. We then create a simple HTML table that displays the CSV data. The foreach loop iterates through the collection of objects that we passed from the controller, and displays each record as a row in the table.
Conclusion:
Try this tutorial and if you do not understand anything or face any issue while applying this method. Do not hesitate to comment below. My COde Bit team will try to respond ASAP.
See Also:
Send Emails in ASP.NET Core 5 Using Gmail API
What Is File Size Upload Limit In NFT Minting? Solution
Email Confirmation with ASP.NET Core Identity


