
Want to share with your friends how to optimize Windows 11 but don’t know how to take a screenshot on Windows 11? The following article will give you some of the best methods tofollow to take a screenshot of Windows 11.
Taking screenshots is an extremely convenient feature on smartphones, tablets or PCs running Windows 11. For Microsoft’s desktop operating system, you can already take screenshots with ease. by how many different ways. In this article, I will show you the best ways to take a screenshot of Windows 11 on the desktop.
Learn These 4 Easy Ways for How to Take a Screenshot on Windows 11 Without Using Software
Using the PrtSc . key
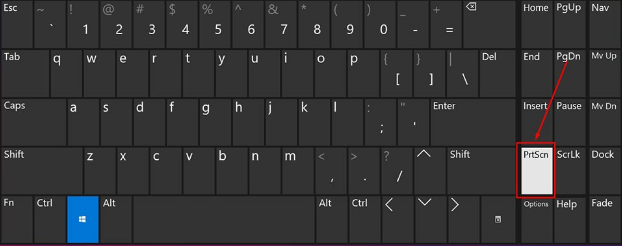
Before Windows 11, you could take screenshots with a single key, the PrtSc key. On some large keyboards, this key is also shown specifically as Print Screen. To capture the activities that are happening on the screen, you just need to press this key and then the screenshot will be saved inside the clipboard. You can paste that image into some Windows 11 applications (Paint, Paint 3D, Word, email…) to view, save the image or share it out.

If you just want to capture the currently active application window on the screen, use Alt + PrtSc. Similar to when you press the PrtSc button, this key combination will also capture the activity on the screen and save the image to the clipboard. So, you can also paste photos into any application to edit or share externally.
Use Windows + PrtSc . key combination

Similar to the above method, you can also press the Windows + PrtSc key combination to take a screenshot. However, this key combination will automatically save the image in a folder on your computer. By default, screenshots will be saved inside the PicturesScreenshots folder of the hard drive containing the Windows 11 operating system.
Using the Snip & Sketch Tool to Take a Screenshot of Windows 11
Snip & Sketch is a built-in application on the Windows platform that allows users to take screenshots without software, comes with the ability to edit images, and will also copy screenshots. to the Clipboard.
Step 1: Start Snip & Sketch by pressing Windows + Shift + S key combination.
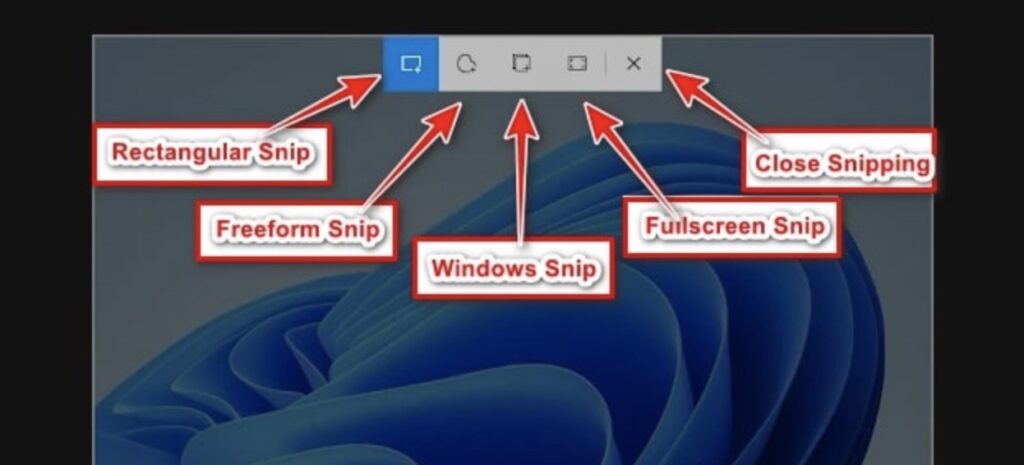
A toolbar will appear at the top of the screen. With this toolbar, you can find different manipulation options with Snip & Sketch including: snapping rectangular frames (Rectangular Snip), capturing freeform frames (Freeform Snip), capturing a window (Windows Snip). ), capture full screen (Fullscreen Snip) and exit button Snip & Sketch (Close Snipping).
Step 2: After capturing the computer screen, a notification window will appear in the lower right corner of the screen, click on this message to open the screenshot just taken with Snip & Sketch software.

Step 3: Perform image editing steps using the built-in tools on the toolbar in the middle. While the function button combination on the right side of the toolbar includes functions: zoom, save image, copy to clipboard and share. If you want to take a new photo, click the New button in the left corner of the toolbar.

As mentioned above, users can completely assign the PrtScn (or Fn + PrtScn) key to quickly open the Snip & Sketch software instead of using the Windows + Shift + S key combination.
To perform this key assignment, readers perform the following steps:
Step 1: Access the Start menu, then search for the keyword Settings, click on the Settings App icon.

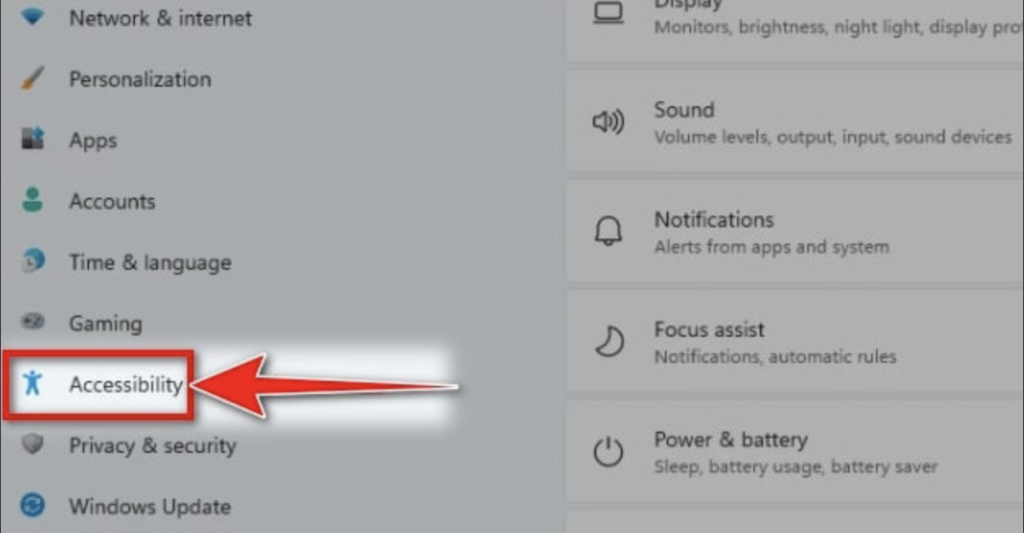
Step 2: In the left pane, click Accessibility.
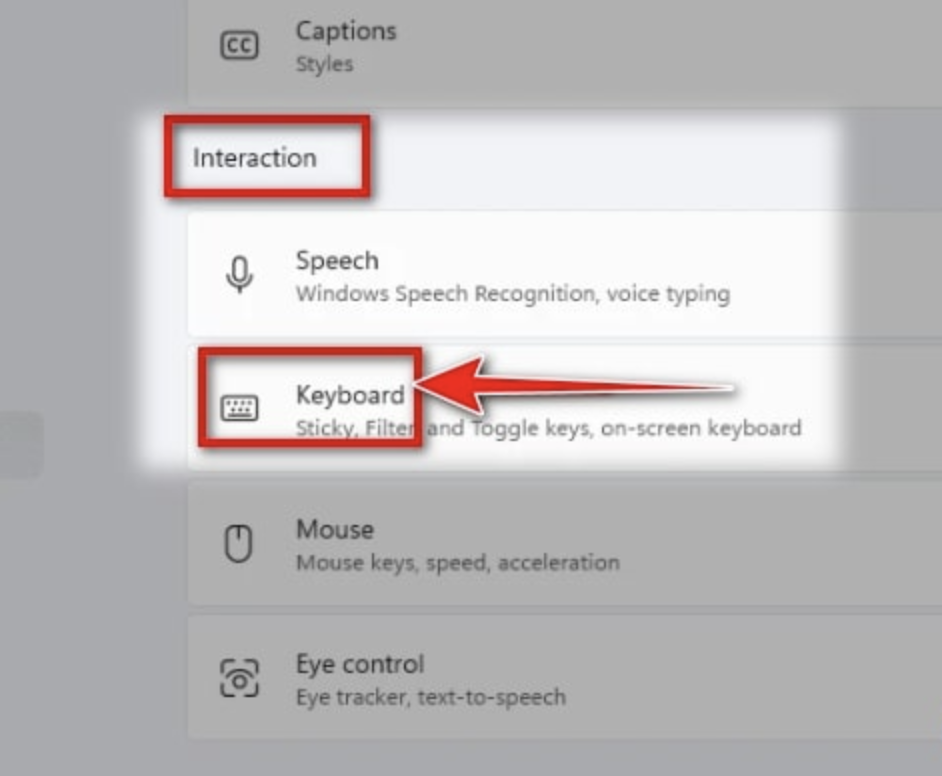
Step 3: Next, drag the menu down to the Interaction section and click on the Keyboard option.
Step 4: Click the switch icon under “Use the Print Screen button to open screen snipping” to On mode.
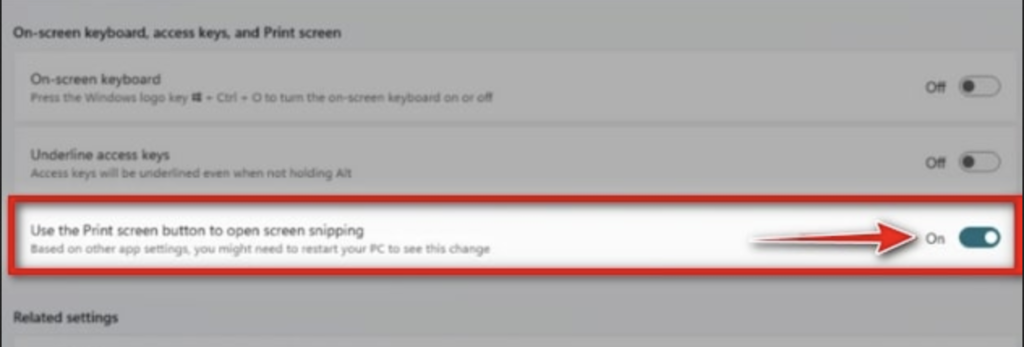
Step 5: Restart the computer to apply the changes. You can now start the Snip & Sketch tool with just the PrtSrn key (or Fn + PrtScn)
So, we have shared 4 ways to learn how to take a screenshot on Windows 11 computers. Thank you for taking a little time to view my article. If you find it interesting, please give me a like, a share and don’t forget to leave a comment on our site.


![Async Await c# Error Handling [SOLVED!]](https://mycodebit.com/wp-content/uploads/2023/10/rich-tervet-q2GNdFmhxx4-unsplash-360x240.jpg)

![How to Handle Divide by Zero Error in c# [Complete Guide]](https://mycodebit.com/wp-content/uploads/2023/10/clement-helardot-95YRwf6CNw8-unsplash-360x240.jpg)
