
You can apply the ways to split screen Windows 11 in this article to increase efficiency when working as well as entertainment.
If you often have to work with multiple applications simultaneously, switching between windows can be confusing, time consuming, and even annoying when you have to constantly use the Alt + Tab key combination. However, Windows 11 has a solution to help you improve your multitasking experience: the Snap feature. Before going through the tutorial on how to split screen Windows 11 and practice, you need to make sure the Snap feature is enabled in the Settings app.
Enable Split Screen Feature in Windows 11
Snap feature is enabled by default on Windows 11, though you should also check this to make sure there are no issues with split screen on your computer.

To check if the Snap feature is enabled, press the Windows + I key combination to open the Settings application on a Windows 11 computer. This application will open with the System view (system settings) by default. determined. In the system settings page, search and click on the Multitasking option located in the right pane.

Then check if the On/Off switch is working.
Split Screen Windows 11 with Snap Layouts Button
Windows 11 will make split screen much easier and faster with the Snap Layouts button built right into the maximize button on each application window. Now you no longer have to hold and drag a window to the side or manipulate a keyboard shortcut to activate the Snap feature.

To use the Snap Layouts button in Windows 11, move your mouse pointer over the maximize button near the top-right corner of the application window. A small box will appear with four or six different options for split screen.

The first option splits the screen into two equal parts. At this point, the two application windows will take up equal space on the computer screen.
The second option also splits the screen but has an uneven distribution of the screen space used by the windows. In this case, the left window will take up more space than the right window.
The third option divides the screen into three equal parts.
The fourth option divides the screen into three parts, the left half of the screen will have one window and the right half of the screen is divided in two to accommodate the other two windows.
The fifth option divides the screen into four equal parts for four application windows to display simultaneously.
The sixth option divides the screen into three parts with the middle window wider than the two on either side.
So, How to Split Screen Windows 11?
After you understand how to use the Snap Layouts button on the Windows 11 application window, you can split the screen by following the steps below:

Step 1. Open the application windows you want to split, move the mouse pointer over the maximize button and choose one of the two Windows 11 split screen options.
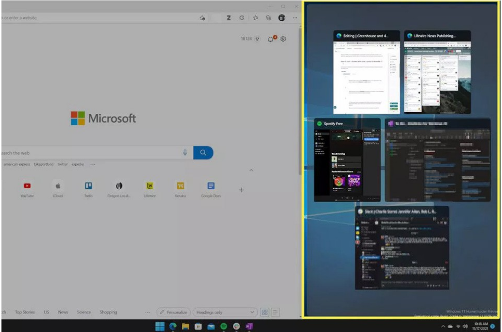
Step 2. Then the current application window is displayed on one half of the screen and you will see other open applications as thumbnails on the other half of the screen. The next thing you need to do is select the application window that you want to display on the other half of the screen.
You should now have two application windows on the desktop. You can access and work on them at the same time. You also have the option to change the size of the windows. Just move the mouse pointer to the line separating the two windows and a bold line will appear. Then you just hold and drag that line horizontally to resize any window.
The above instruction has helped you how to split screen Windows 11 easily. Hope you all success when trying and see you in the next tech guides on our website.


![Async Await c# Error Handling [SOLVED!]](https://mycodebit.com/wp-content/uploads/2023/10/rich-tervet-q2GNdFmhxx4-unsplash-360x240.jpg)

![How to Handle Divide by Zero Error in c# [Complete Guide]](https://mycodebit.com/wp-content/uploads/2023/10/clement-helardot-95YRwf6CNw8-unsplash-360x240.jpg)
