How To Send Eth From Coinbase To Metamask? 4 Easy Steps To Follow

send eth from coinbase to metamask

How To Send Eth From Coinbase To Metamask?

As you know, Metamask is a web browser extension (available in Chrome, Firefox and Brave) that is used to store, transfer and receive Ethereum as well as interact with thousands of ERC20 tokens growing on the Ethereum blockchain. So far, Metamask is still the most used and most convenient when dealing with ETH and ERC20 tokens. Metamask is almost supported by many DEXs, many public sale contracts only support connection to Metamask. Meanwhile, Coinbase Wallet and MyEtherwallet, only a few DEXs support. So there are many people who want to know the ways how to send ETH from Coinbase to metamask or any other wallets.

In this blog post, we’re going to walk you through the process to send eth from coinbase to metamask. It is an important process if you want to start investing in NFTs. Let’s get started!

Instructions on How to Import Coinbase Wallet into MetaMask

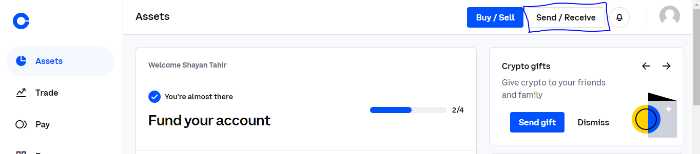
First, you need a Coinbase Wallet account, as well as MetaMask. We can see here I am logged into coinbase and click on send/receive button to send your ETH to metamask.

send eth from coinbase to metamask

After that click, you will have a pop-up like this. You can select the currency of your choice, that you want to transfer. We will select here Etherium. If you’re in the U.S, Canada, or in a different country, So basically your screen might look a little bit different, based on your currency.

send eth from coinbase to metamask

So you can see here, what I have selected $10 worth of Ethereum to send to my metamask wallet.

You can also see the currency swap button with the amount I have entered, with this button you can swap the currency to send. You can fill this amount with US dollars and with Eth as well. It’s up to your convenience.

We can also see. I’ve metamask installed.

send eth from coinbase to metamask

Now you can click on this copy button that I have encircled, after opening your metamask wallet.

Your Ethereum address to receive Eth in your MetaMask has been copied. Now paste this address into the “To” section.

send eth from coinbase to metamask

After you put the Eth receiving address into your coinbase account, It will recognize its Eth address. You can also add the message to the transaction, it optional. After this, your continue button will be enabled. So you can perform the transaction. I do not have a balance in this account that’s why it’s not enabled in the above screenshot.

If 2-step verification has been enabled in your coinbase account. Enter the specific code and click done. Now you have successfully sent eth from coinbase to metamask.

If you’ve sent the amount to the wrong address by mistake so it’s impossible to get back your amount. I would suggest that if you are sending a large amount then try to perform a test transaction first. It can cost you a little bit more in gas fees. But honestly, it’s well worth saving yourself the potential loss of a big amount of dollars.

Related: How to Buy NFT on Coinbase? Step to Step Guide

Conclusion:

Above is the basic information about Coinbase wallet and instructions on how to send ETH from coinbase to metamask. Coinbase wallet is a product of the Coinbase exchange, but completely separate from its exchange. This wallet helps users to securely store their assets while managing their own private keys. For those who are familiar with MetaMask, switching to Coinbase Wallet will not take too long to get used to it. Although, this wallet looks similar to Metamask but it also has distinct features and is popular with many people.

send eth from coinbase to metamask

Metamask allows you to manage multiple ETH wallets at the same time. This will be very convenient for those who have many wallets.

Transferring cryptocurrency from one wallet to another is usually a quick and easy process. However, the transaction may be delayed due to network congestion. Whenever you send crypto to another wallet, make sure you paste the correct wallet address. Otherwise, your money may be lost.

If you have any queries, please feel free to ask in the comments section below. Thanks for reading!

Verifying the Transaction on Etherscan

After sending ETH from Coinbase to MetaMask, it’s important to verify the transaction to ensure that it was successful. This can be done using Etherscan, a block explorer for the Ethereum network. Here are the steps to follow:

Etherscan is a website that allows users to view and analyze transactions on the Ethereum blockchain. It provides a wide range of information about each transaction, including the sender and recipient addresses, the amount of ETH transferred, and the transaction fee.

Finding the transaction on Etherscan

To find the transaction on Etherscan, first navigate to the website (etherscan.io). Once there, locate the search bar at the top of the page and enter the hash of the transaction. The transaction hash can be found on the Coinbase website or in the MetaMask wallet under the “Activity” tab.

Checking the transaction details to ensure it was successful

Once you’ve found the transaction on Etherscan, you can check the details to ensure that it was successful. Some important things to look for include:

  • Confirmations: This indicates the number of blocks that have been added to the blockchain since the transaction was processed. Generally, the more confirmations a transaction has, the more secure it is.
  • Gas Price: This is the amount of ETH paid to the miners for processing the transaction. Make sure it’s not too high or too low.
  • Gas Limit: This is the maximum amount of gas that can be used to execute the transaction. If the gas limit is too low, the transaction may fail.
  • Status: This should say “Success” if the transaction was processed successfully.

If all of these details look correct, then your transaction was successful and the ETH should now be in your MetaMask wallet. If there are any issues or errors, you may need to contact Coinbase support for assistance.

Verifying transactions on Etherscan is an important step to ensure that your funds are safe and secure. By following these steps, you can have confidence that your ETH transfer was successful and that your funds are where they’re supposed to be.

Network fees

When sending ETH from Coinbase to MetaMask (or any other wallet), you’ll need to pay a network fee to cover the cost of processing the transaction. This fee is paid to the miners on the Ethereum network, who perform the calculations necessary to validate and record the transaction on the blockchain. Here are some things to keep in mind when paying network fees:

Check the current fee levels

Network fees can vary depending on a number of factors, including network congestion, transaction volume, and gas prices. Before sending ETH from Coinbase to MetaMask, it’s a good idea to check the current fee levels and adjust your transaction accordingly. You can usually find this information on the Coinbase or MetaMask websites, or on a site like Etherscan.

Choose the right gas price

The gas price you choose will determine how quickly your transaction is processed, as well as how much you’ll pay in fees. If you’re not in a hurry, you can choose a lower gas price to save on fees, but this may result in slower transaction times. If you need your transaction to go through quickly, you may want to choose a higher gas price, but be aware that this will increase your fees.

Adjust the gas limit if necessary

The gas limit is the maximum amount of gas that can be used to execute the transaction. If the gas limit is too low, the transaction may fail or be rejected by the network. If the gas limit is too high, you may end up paying more in fees than you need to. You can usually adjust the gas limit on the Coinbase or MetaMask websites when sending your transaction.

By paying attention to network fees and adjusting your transaction accordingly, you can save money and ensure that your ETH transfer goes through smoothly. Remember to always double-check the details of your transaction before sending it, including the gas price, gas limit, and recipient address. If you’re not sure about something, it’s always better to ask for help than to risk losing your funds.

Other cryptocurrencies

While this article focuses specifically on sending ETH from Coinbase to MetaMask, the process for sending other cryptocurrencies is generally similar. However, there may be some differences in terms of the specific steps involved or the fees charged, so it’s always a good idea to check the documentation for each wallet and exchange before proceeding. Here are some tips for sending other cryptocurrencies from Coinbase to MetaMask:

Choose the right cryptocurrency

Coinbase supports a wide range of cryptocurrencies besides ETH, including Bitcoin, Litecoin, XRP, and many others. When sending crypto from Coinbase to MetaMask, make sure that you’re sending the correct currency to the correct wallet. The process for sending different currencies may be slightly different, so be sure to follow the instructions carefully.

Check the transaction fees

The fees charged for sending different cryptocurrencies can vary widely, depending on the network and the current market conditions. Before sending your crypto from Coinbase to MetaMask, it’s a good idea to check the current fees and adjust your transaction accordingly. You can usually find this information on the Coinbase or MetaMask websites, or on a site like CoinMarketCap.

Verify the transaction

After sending your crypto from Coinbase to MetaMask, you should verify the transaction on the appropriate block explorer for the currency in question. For example, if you’re sending Bitcoin, you’ll want to use a block explorer like blockchain.com to check the status of your transaction. Make sure that the transaction has been confirmed and that the funds have been transferred to your MetaMask wallet.

Troubleshooting tips

Even if you follow all of the steps correctly, sometimes things can go wrong when sending crypto. If you encounter any issues (like a failed transaction or missing funds), there are a few things you can try. Here are some troubleshooting tips to help you resolve any issues that may arise:

Check the transaction status on Etherscan

If your transaction appears to be stuck or hasn’t been processed yet, you can check the status on Etherscan to see if there are any issues with the network or the transaction itself. Look for error messages or warnings, and check to see if the transaction has been confirmed. You can also check the gas price and gas limit to make sure they’re correct.

Contact Coinbase or MetaMask support

If you’re experiencing technical issues or are unsure about how to proceed, don’t hesitate to contact the support teams for Coinbase or MetaMask. They should be able to help you troubleshoot the issue and find a resolution. Be sure to provide as much information as possible about your transaction, including the transaction hash and any error messages you’ve received.

Try resetting your wallet or reinstalling the MetaMask extension

If you’re still having issues, you can try resetting your wallet or reinstalling the MetaMask extension. This can help to clear any cached data or fix any corrupted files that may be causing the problem. Be aware that resetting your wallet will erase any data or transactions that haven’t been confirmed yet, so make sure that you’ve backed up your seed phrase before proceeding.

FAQs:

Q: Can I transfer BTC from coinbase to metamask?

A: Yes, you can! The process is similar to the one outlined in this blog post.

Q: How long does it take for the transaction to go through?

A: It depends on the Ethereum network congestion at the time of your transaction. Generally, it takes a few minutes.

Q: What is the gas fee?

A: The gas fee is a small amount of ETH that you pay to have your transaction processed on the Ethereum network. The gas fee goes to the miners who are behind the validation and execution of your transaction.

Leave a Reply