MetaMask is one of the most famous Ethereum blockchain-based crypto wallets that is used for transactions on the Ethereum block. This wallet is mostly used by NFT enthusiasts to buy and sell NFTs. In this post, I will discuss how to create a metamask wallet to trade your NFTs.
First of all, we have to download metamask wallet. You can download it as a browser extension and a mobile app, you can download it as your preference.
How to create a MetaMask wallet? Step-by-step Guide:
Open MetaMask website https://metamask.io/download/. You will have multiple options for installation.
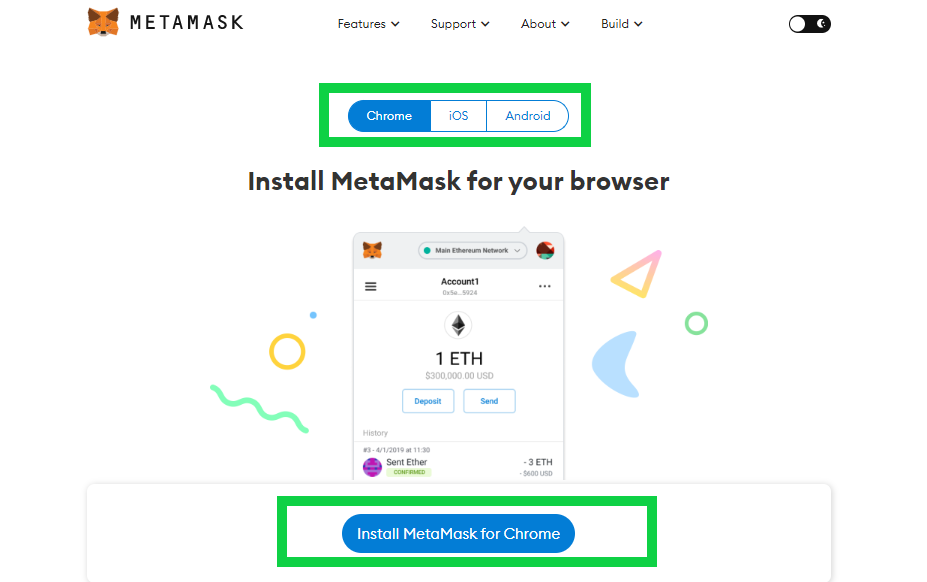
For this tutorial, I’m going with the Chrome extension but the process will remain the same to create a metamask wallet for any option.
After clicking on “Install MetaMask for Chrom”.You’ll be redirected to the chrome extension page where you can install this MetaMask Chrome extension.
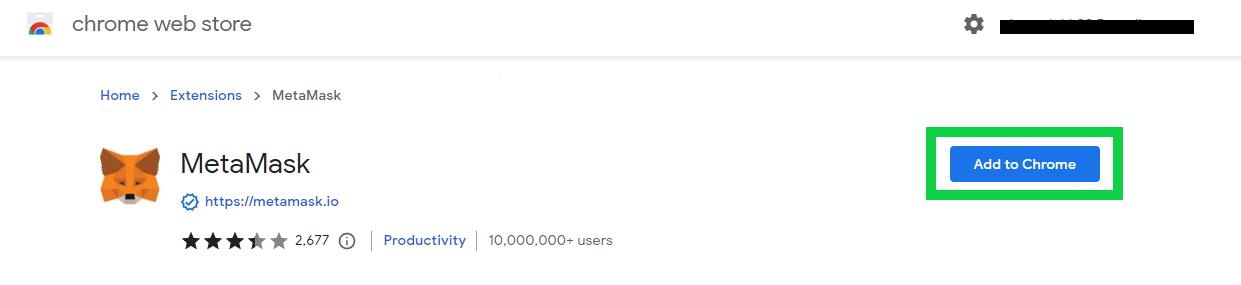
Click on “Add to Chrome” to install this MetaMask extension to your browser. After the installation of the MetaMask chrome extension, you will have an interface like this.
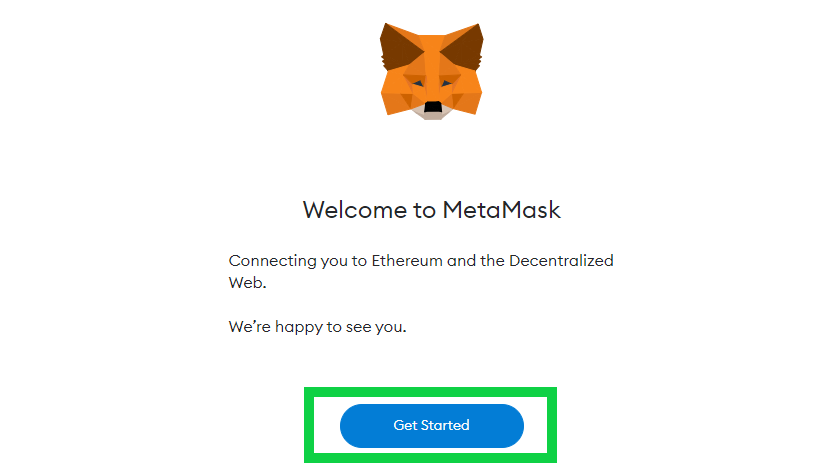
Click on “Get Started”.
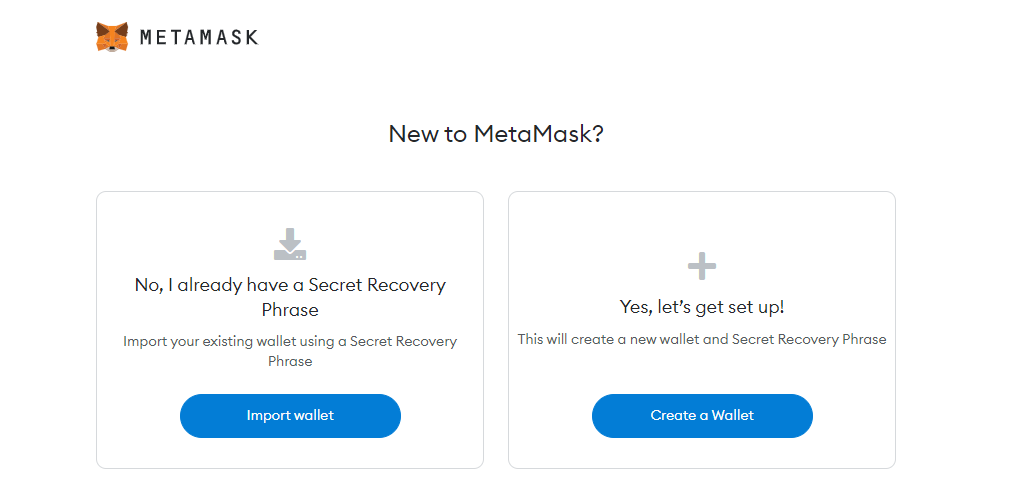
It will show you two options. Import a wallet, if you have already created your account, and create a wallet, if you want to create a new wallet. If you already have created your metamask wallet you can import it by adding your secret recovery phrase. I’m going to create a new wallet for this tutorial. Click on create wallet and you will have some terms and conditions.
Click on I agree after reading all the points carefully. Now it will ask you to create a password for your wallet.
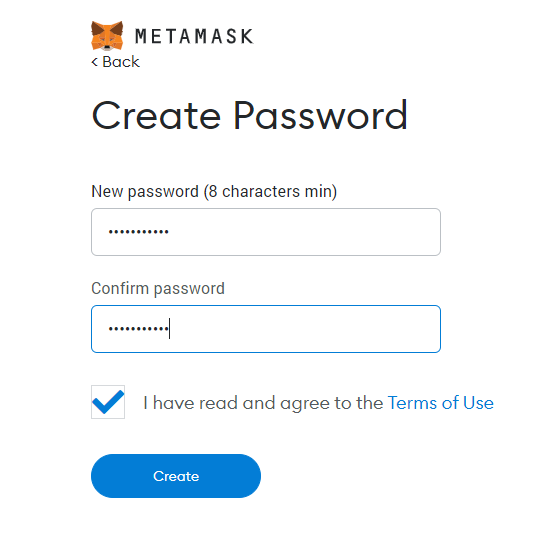
Click on create after putting in your password. Now you will have a video tutorial about securing your wallet like this.
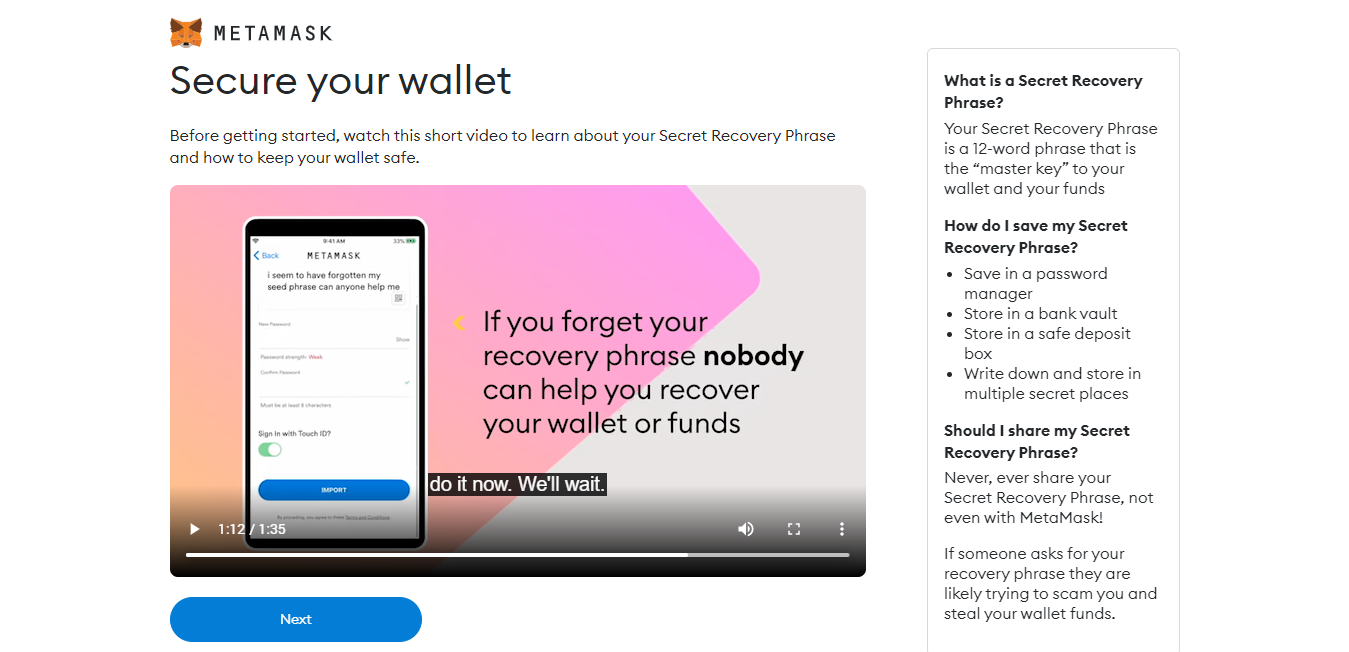
I recommend you to watch this complete 1-minute video carefully. In this video, MetaMask informs users about the importance of the secret security phrase and how you can keep your security phrase secure. A secret recovery phrase is a combination of 12 words that creates a unique sentence. Click on “Next”.
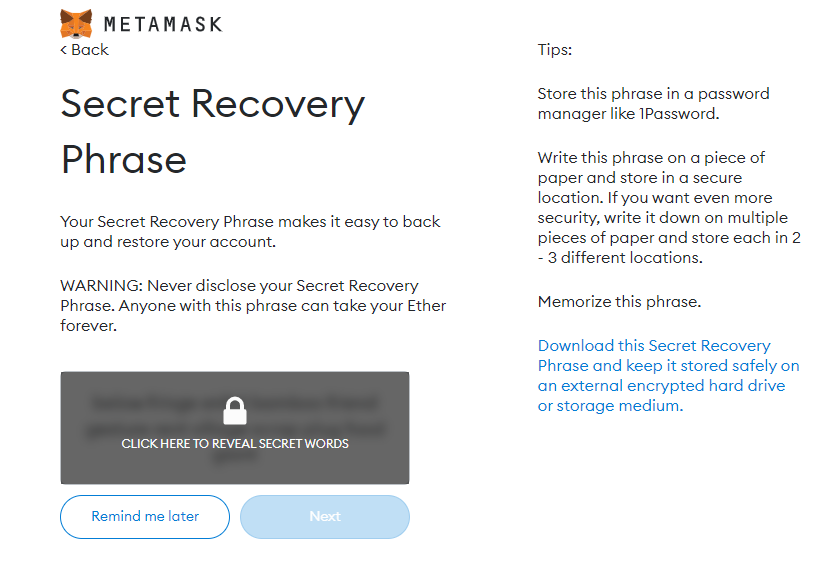
Click on the lock and it will reveal your secret words. Copy that secret recovery phrase and write it down on paper right away because after this step you will have to confirm your secret phrase in the right order. Click on “Next”. Now you will have the option to create your own secret recovery phrase for your metamask wallet.
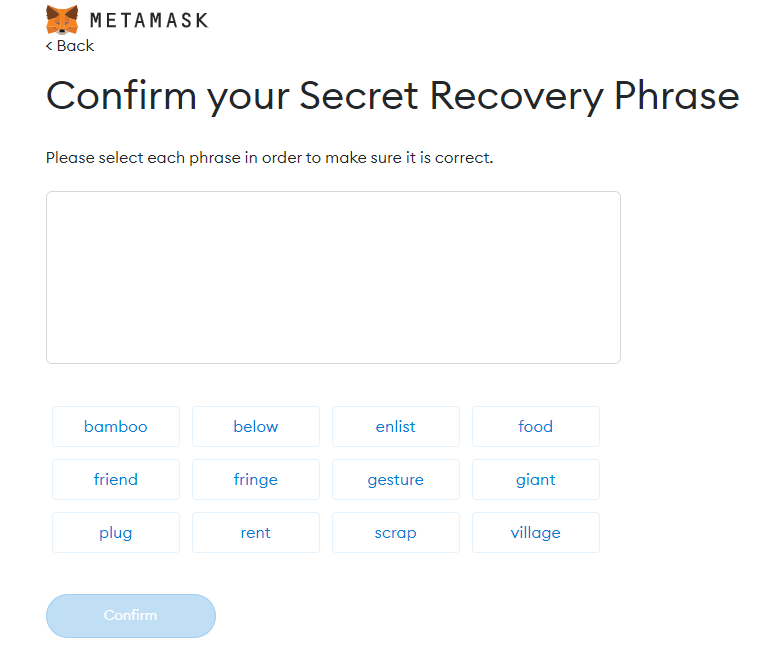
Now click on words one by one as per your preference and confirm your 12-word long secret recovery phrase for your wallet that you have copied from the previous screen. After selecting words in the right order. Click on confirm and your MetaMask wallet will be created.
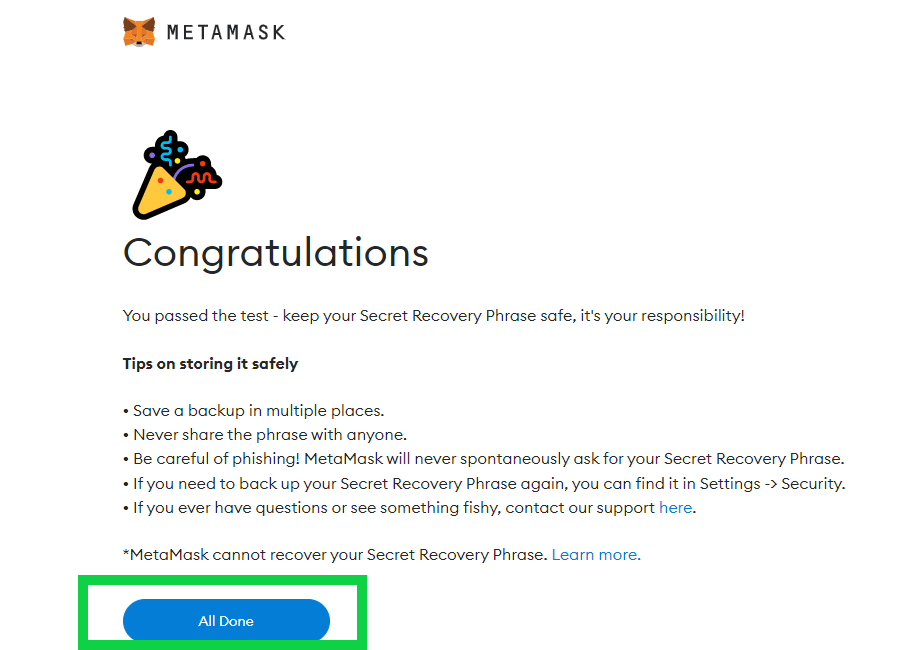
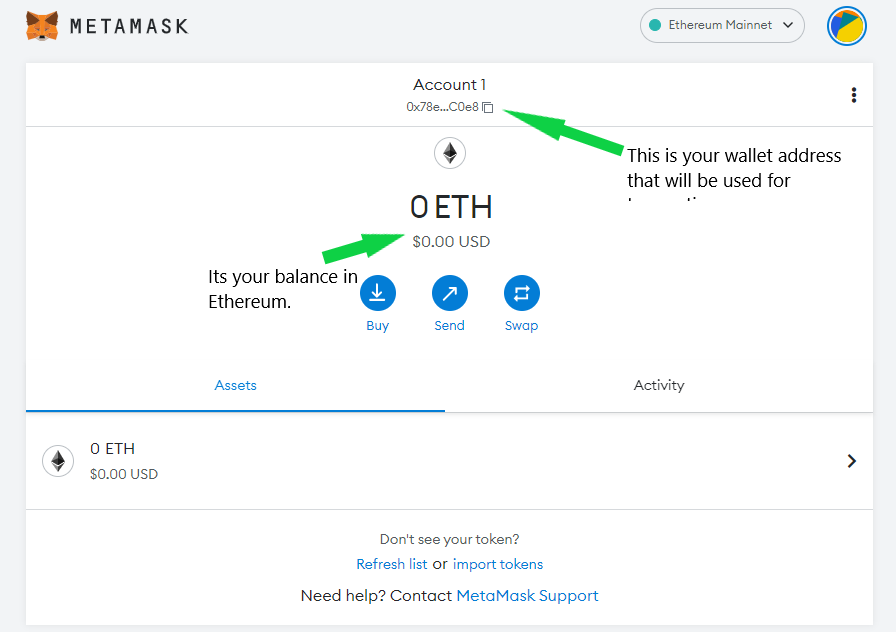
You will have this screen. That is all you have to do to create a metamask wallet. Now, your metamask wallet is successfully created. After clicking on “All Done” you will have your wallet screen. Something like this.
Using your Metamask wallet
Once you have created your Metamask wallet, you can start using it to manage your cryptocurrency and interact with decentralized applications (dApps). Here are the steps to get started:
Connecting to a blockchain network
Metamask supports several blockchain networks, including Ethereum, Binance Smart Chain, and Polygon (formerly Matic Network). To connect to a network, simply click on the network dropdown menu in the top center of the Metamask window and select the network you want to use.
Adding and managing cryptocurrency
To add cryptocurrency to your Metamask wallet, click on the “Add Token” button on the main wallet screen. You can then enter the token symbol or contract address to add the token. Once added, you can view and manage your cryptocurrency holdings by clicking on the token in your wallet.
Sending and receiving cryptocurrency
To send cryptocurrency from your Metamask wallet, click on the “Send” button on the main wallet screen. Enter the recipient’s wallet address and the amount you want to send, and click “Next” to confirm the transaction. To receive cryptocurrency, simply give the sender your wallet address.
Interacting with decentralized applications (dApps)
Metamask allows you to interact with a wide range of dApps, including decentralized exchanges (DEXs), blockchain games, and other decentralized finance (DeFi) applications. To use a dApp, simply navigate to the website and connect your Metamask wallet. You will then be able to interact with the dApp using your Metamask account.
Best practices and security tips
While Metamask is a secure wallet, it is important to take additional precautions to protect your cryptocurrency holdings. Here are some best practices and security tips to keep in mind:
Securing your seed phrase
Your seed phrase is a set of 12 or 24 words that can be used to recover your wallet in case you lose access to it. It is important to write down your seed phrase and store it in a secure location, such as a safety deposit box or a fireproof safe. Never share your seed phrase with anyone, and do not store it online.
Using strong passwords
Your Metamask password should be unique and complex, with a mix of letters, numbers, and symbols. Do not use the same password for multiple accounts, and avoid using personal information in your password.
Enabling two-factor authentication
Metamask supports two-factor authentication (2FA), which adds an extra layer of security to your account. To enable 2FA, go to the security settings in your Metamask account and select the authentication method you prefer.
Keeping your software up to date
To ensure that your wallet is secure, it is important to keep your Metamask software up to date. Metamask regularly releases updates that address security vulnerabilities and improve functionality.
Avoiding phishing scams
Phishing scams are a common tactic used by hackers to steal cryptocurrency. Always double-check the URL of any website you visit and verify that you are using the correct version of Metamask. Be cautious of any unsolicited emails or messages that ask you to share your private information or seed phrase.
Backing up your wallet regularly
Backing up your Metamask wallet is a critical step in protecting your cryptocurrency holdings. Here are the steps to back up your wallet:
- Click on the three dots in the top right corner of the Metamask window and select “Settings”.
- Click on “Security & Privacy”.
- Click on “Reveal Seed Phrase” and enter your Metamask password.
- Write down the 12 or 24 words that appear on the screen in the correct order.
- Store the seed phrase in a secure location, such as a safety deposit box or a fireproof safe. Do not store it online or share it with anyone.
In addition to backing up your seed phrase, Metamask allows you to export your wallet as a file or print a paper wallet for safekeeping. To export your wallet as a file, click on the three dots in the top right corner of the Metamask window and select “Export Private Key”. To print a paper wallet, click on the three dots and select “Print Paper Wallet”.
It is important to back up your wallet regularly, especially if you make any changes to your account, such as adding new tokens or changing network settings. By backing up your wallet, you can ensure that you can always recover your funds in case of a lost or damaged computer.
Remember to keep your seed phrase, wallet file, or paper wallet in a secure location and never share your private information with anyone. By following these best practices, you can protect your cryptocurrency holdings and ensure the security of your Metamask wallet.
Using hardware wallets for added security
If you have a significant amount of cryptocurrency holdings, you may want to consider using a hardware wallet in addition to Metamask for added security. Hardware wallets, such as Ledger or Trezor, are physical devices that store your private keys offline and provide an extra layer of protection against hackers.
Here are the steps to use a hardware wallet with Metamask:
- Purchase a hardware wallet device from a reputable manufacturer.
- Install the manufacturer’s software and follow the instructions to set up your hardware wallet.
- Connect your hardware wallet to your computer and open the manufacturer’s software.
- Install the Metamask extension in your browser and create a new wallet.
- Click on the three dots in the top right corner of the Metamask window and select “Connect Hardware Wallet”.
- Follow the prompts to connect your hardware wallet to Metamask.
Once your hardware wallet is connected to Metamask, you can use it to manage your cryptocurrency holdings as you would with a regular Metamask wallet. The difference is that your private keys are stored offline on the hardware device, making it much more difficult for hackers to steal your cryptocurrency.
While hardware wallets provide excellent security, they do come with some downsides. They can be more expensive than software wallets, and they can be more difficult to use for beginners. Additionally, if you lose your hardware wallet or forget your PIN, you may lose access to your funds permanently.
By considering the benefits and drawbacks of hardware wallets, you can determine if they are the right choice for your cryptocurrency holdings. If you do decide to use a hardware wallet, be sure to purchase one from a reputable manufacturer and follow the manufacturer’s instructions carefully to ensure that your wallet is set up correctly.
Setting gas fees
When sending transactions on the blockchain, you need to pay a small fee known as a gas fee. Gas fees are paid to miners who process and verify transactions on the blockchain network. The amount of gas fee you pay depends on how quickly you want your transaction to be processed.
Metamask allows you to adjust the gas fees to prioritize speed or lower costs, depending on your needs. Here are the steps to set gas fees in Metamask:
- Click on the “Advanced Options” button when sending a transaction.
- Under “Gas Fee”, select “Edit”.
- You can then choose to select a custom gas fee, or choose from the recommended options for fast, medium, or slow transaction speeds.
- Once you have selected your gas fee, click “Save” and confirm your transaction.
Keep in mind that selecting a higher gas fee will result in faster transaction processing times, but will also be more expensive. Conversely, selecting a lower gas fee will be less expensive, but will take longer to process.
It is important to keep track of gas fees when using Metamask, as they can add up over time and impact the profitability of your cryptocurrency investments. By setting the appropriate gas fees for your needs, you can manage your transaction costs effectively and optimize your returns.
Conclusion:
Ethereum blockchain is the most popular blockchain in the NFT and crypto space. So if you want to jump into the NFT space, metamask is one for you. There are many other blockchain wallets also available in the market but the most popular is MetaMask. Securing your metamask should be the first priority, the best method to save your security recovery phrase is to write it on two or three different papers and save them in different secure places.
Make sure no one has access to them. Because if someone has access to your security phrase, they can easily steal your blockchain assets. If you lost your security phrase there is no way to recover your wallet even the metamask team can not help you to recover it. So this is how decentralization work. You have complete control of your wallet. No third party is involved like banks. You can access your metamask wallet through an android or iOS application by simply downloading it to your smartphone.
Related: How To Send Eth From Coinbase To Metamask? Easy Steps
2 thoughts on “How To Create a MetaMask Wallet? Step By Step Guide”