
With just a few simple steps, you can create a backup of your entire Windows 11 or Windows 10 system and restore it when needed, without having to reinstall the entire operating system. The following are detailed instructions on how to backup Windows 11 system. We made the article with a PC running Windows 11, but you can apply the same to a PC running Windows 10 as well.

Usually, when a Windows 11 computer has an operating system failure, you need to reinstall it with all the necessary software and reset everything according to usage habits. These operations often take a lot of time and effort.
Instead, create a full backup of Windows 11 system while it’s running smoothly. When the operating system crashes and you can’t fix it, you just need to restore it from the created backup, and everything will be ready for you to use.
What is a full Windows system backup?
It is a complete copy of the entire drive containing the operating system (usually the C drive) and all the software you have installed, along with all associated data files. In other words, it is everything on the drive that contains the operating system, including personal data created by you.
When the operating system fails, simply restore it from this backup and you’ll have everything you need as if nothing happened – no need to reinstall Windows and necessary applications.
So, How to backup Windows 11 with full system creation?
To create a full system backup on Windows 11, we need to use a classic tool available on Windows since the time of Windows 7 called Backup and Restore (Windows 7).
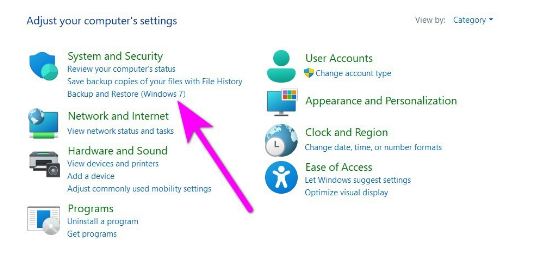
Step 1: To launch it, you open the Control Panel by pressing the button, then Start typing the keyword Control Panel, and then select the first result in the list.

Step 2: In the Control Panel window, find the System and Security section, and then click on the Backup and Restore (Windows 7) link.
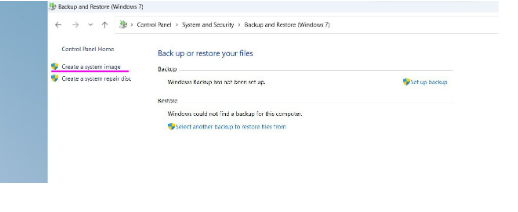
Step 3: In the Backup and Restore window, click the Create a system image link in the left pane.
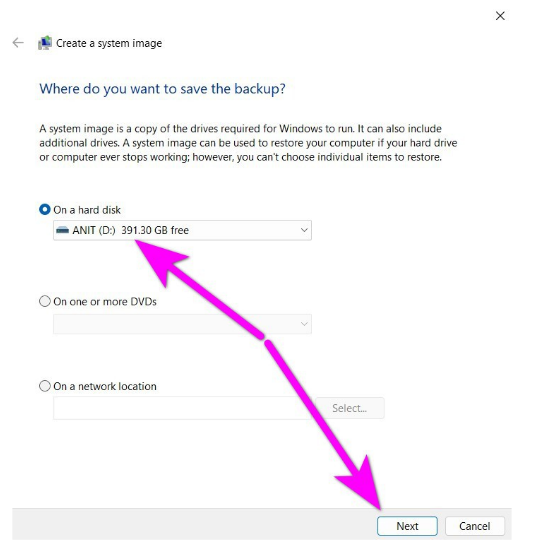
Step 4: Windows will ask you to choose where you want to save the backup. You can save the backup to another partition on your local drive, external drive, DVD disc, or network drive. Select the option you like, and then click the Next button.
Step 5: Windows will display a window for you to review all that it will back up. Here, you click the Start backup button.
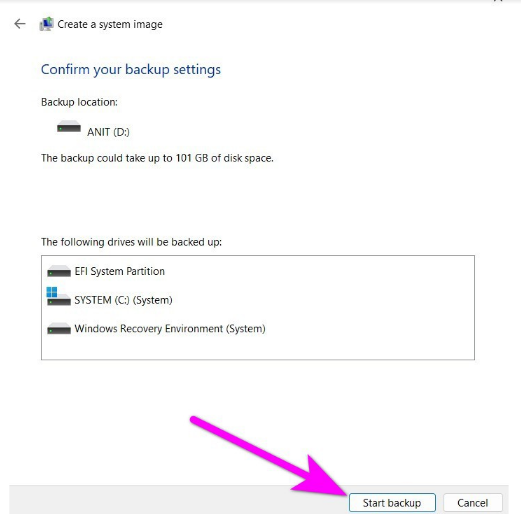
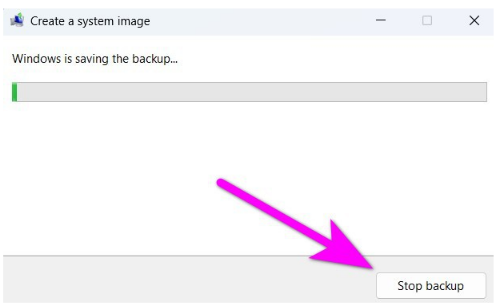
Immediately, the backup process will begin. The backup process is fast or slow depending on the amount of data on the partition containing the operating system. If you change your mind, you can click the Stop backup button to cancel the backup process.
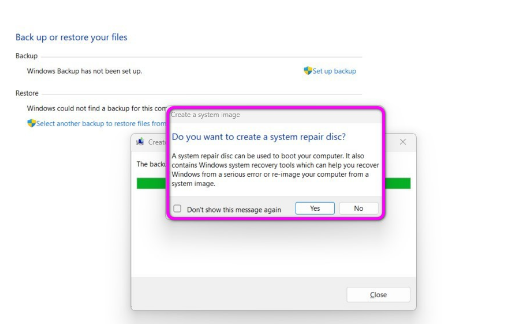
Step 6: When the backup is complete, Windows will ask if you want to create a system recovery CD/DVD in case the computer cannot boot into Windows. If desired and the computer has a CD/DVD drive available, select Yes and vice versa.
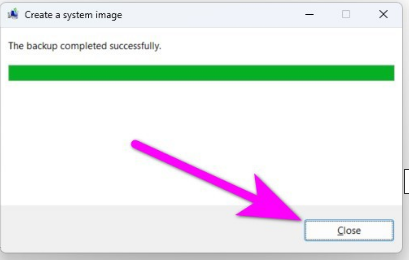
Step 7: When everything is done, simply click the Close button to close the Create a system image window.
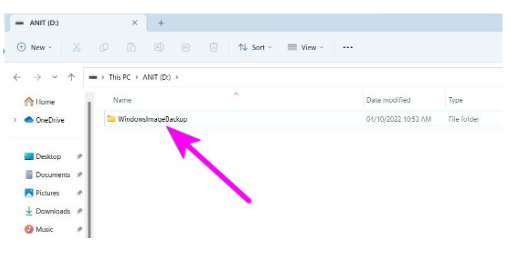
Now open the drive containing the backup copy, you will see a new folder named WindowsImageBackup. Do not edit or move this folder.
How to restore the entire system on Windows 11
Later, when the operating system fails and you cannot fix it, run the Backup and Restore tool (Windows 7) according to the instructions above, select the option Select another backup to restore files from, then select the backup you created. Windows will restore the entire system to a stable state when you create a backup.

The above instruction has helped you how to backup windows 11 in fast and easy ways. Hope you will be succesful when trying these methods and see you in the next tech tutorials on our website.


![Async Await c# Error Handling [SOLVED!]](https://mycodebit.com/wp-content/uploads/2023/10/rich-tervet-q2GNdFmhxx4-unsplash-360x240.jpg)

![How to Handle Divide by Zero Error in c# [Complete Guide]](https://mycodebit.com/wp-content/uploads/2023/10/clement-helardot-95YRwf6CNw8-unsplash-360x240.jpg)
